
Hello Folks 👋
This is Savio here. I'm young dev with an intention to enhance as a successful web developer. I love building web apps with React. I have proved my superiority in frontend technologies.
Today, Let's learn how you can set up Email Authentication with reset password option in your React App 🚀. So, be with me! Let's code something amazing!
Table of Contents
- Create React App
- Setup Firebase
- Handling SignUp
- Handling SignIn
- Handling Reset Password
- Handling SignOut
- Testing Up
Create React App
First of all, we first have to create a react app. You know it!
npx create-react-app firebase-auth
This will create you a normal react app. You can start the server by npm start. Now, let's have a look at our folder structure 🥁
src/
├── components/
       ├── Home.js
       ├── Reset.js
       ├── SignUp.js
       └── SignIn.js
├── App.css
├── App.js
└── index.js
Inside the components folder, create 2 new files Home.js and SignIn.js, Home.js act as our home page, and SignIn.js is our register page.
Now, let's add some basic CSS styles to our App.css, this will be used soon ⬇️
@import url(https://fonts.googleapis.com/css?family=Poppins:100,100italic,200,200italic,300,300italic,regular,italic,500,500italic,600,600italic,700,700italic,800,800italic,900,900italic);
* {
  margin: 0;
  padding: 0;
  box-sizing: border-box;
}
body {
  font-family: "Poppins", sans-serif;
  background: #181717;
}

.wrapper {
  max-width: 480px;
  width: 100%;
  height: 100vh;
  display: flex;
  justify-content: center;
  align-items: center;
  flex-flow: column;
  overflow: visible;
  padding: 1rem;
  margin: 0 auto;
}
.main-heading {
  color: #fff;
  overflow: visible;
  margin-bottom: 0.5rem;
}
.sub-text {
  color: #ccc;
  font-size: 15px;
}

.form-wrapper {
  width: 100%;
  text-align: center;
  padding: 1rem;
}

.input-field {
  display: flex;
  flex-flow: column;
  align-items: flex-start;
  width: 100%;
  padding: 0.5rem 0rem;
}
.input-field label {
  color: #ccc;
  font-size: 14px;
}
.input-field input {
  width: 100%;
  padding: 0.75rem;
  border-radius: 13px;
  outline: none;
  background: #212121;
  border: 2px solid #424242;
  margin-top: 0.5rem;
  color: #fff;
  font-family: inherit;
}
input:focus {
  border: 2px solid #f80759;
}

.form-wrapper button,
.main-button {
  background: linear-gradient(to right, #bc4e9c, #f80759);
  color: #fff;
  width: 100%;
  padding: 0.75rem;
  font-weight: 600;
  font-family: inherit;
  margin-top: 0.75rem;
  outline: none;
  border: none;
  border-radius: 13px;
  cursor: pointer;
  transition: all 0.3s ease;
}
.form-wrapper button:hover {
  opacity: 0.9;
}

.bottom-message {
  width: 100%;
  text-align: center;
  color: #ccc;
  margin-top: 2rem;
}
.bottom-message h5 {
  font-weight: 400;
}
.bottom-message h5 a {
  color: #fff;
  font-weight: 600;
  text-decoration: none;
}
Before, we go, we need to install our dependencies ⬇️
| Dependency | Description |
|---|---|
| react-router-dom | Declarative routing for React |
| Firebase | Firebase provides the tools and infrastructure you need to develop, grow, and earn money from your app. This package supports web (browser), mobile-web, and server (Node.js) clients. |
npm i firebase react-router-dom
That's All for the basic setup, lets jump right into setup firebase.
Setup Firebase
Here come the most important and the most amazing part, I'm sure you're gonna learn a lot!
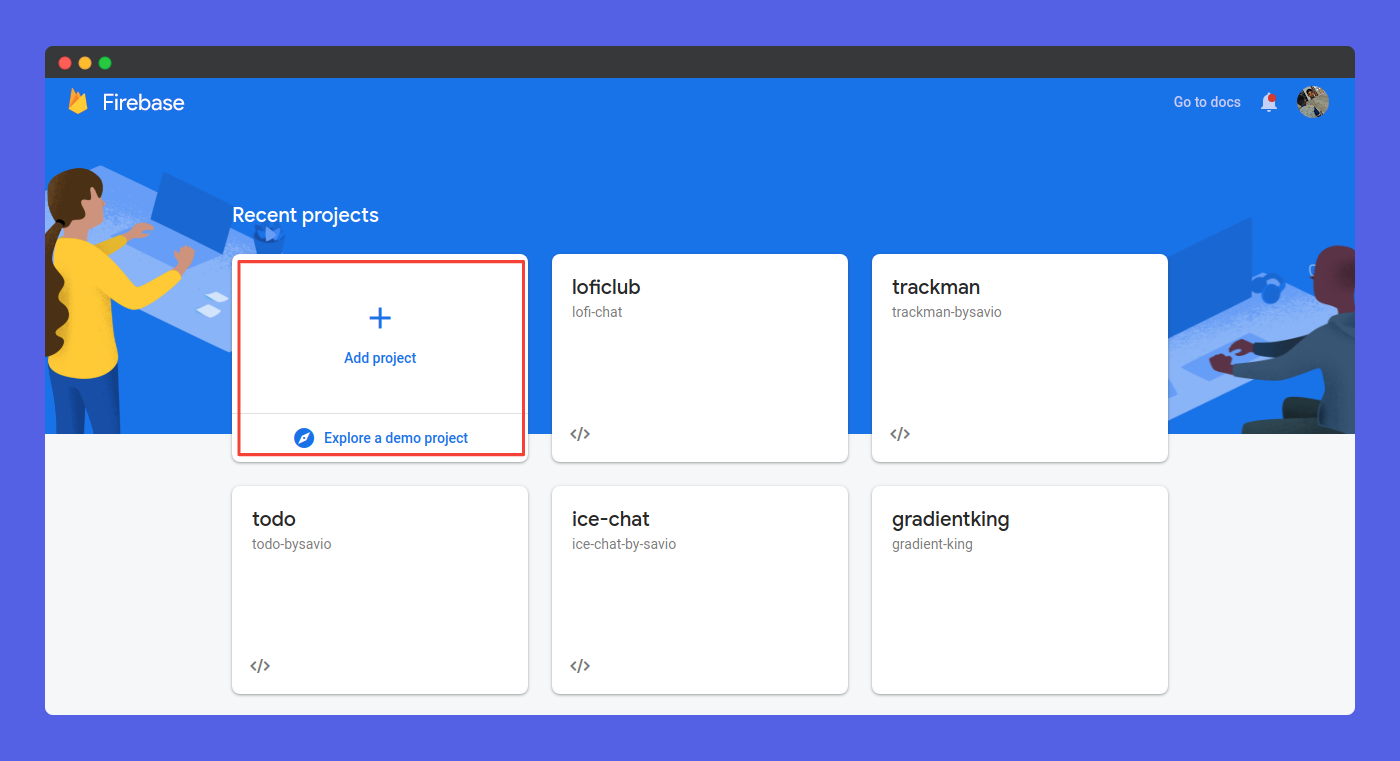
First of all, got to you firebase console, Create a new project. After creating a project, click on Web button to register your web app.

Now, go to Project Settings > Config to get your firebaseConfig. Make sure to copy that, you'll need later.
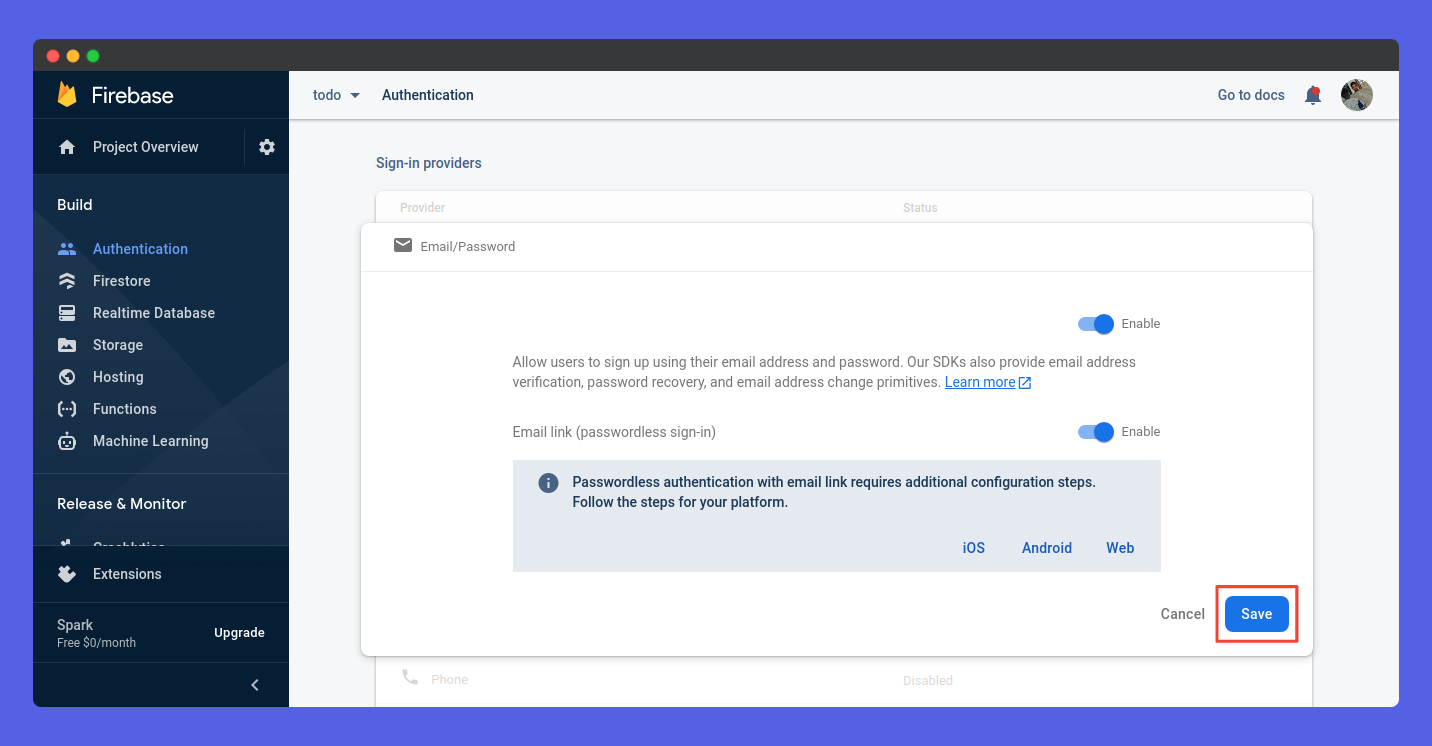
Now go to Authentication tab and enable Email/Password Authentication That's all that we need to do now. Let's just jump to writing code.
Handling SignUp
First of all, let's configure our project. For that lets' head over to App.js and use the following code ⬇️
const firebaseConfig = {
    apiKey: "XXXXXX",
    authDomain: "XXXXXX",
    projectId: "XXXXXX",
    storageBucket: "XXXXXX",
    messagingSenderId: "XXXXXX",
    appId: "XXXXXX",
    measurementId: "XXXXXX",
};

firebase.initializeApp(firebaseConfig);
That's all for the initialization of firebase in our project. Now, let's extract auth method from firebase.
const auth = firebase.auth();
Now, let's import our components, Use the following code for that 🚀
import Home from "./components/Home";
import SignIn from "./components/SignIn";
import SignUp from "./components/SignUp";
import Reset from "./components/Reset";
Now, lets route our application, for that, lets import react-router-dom
import { BrowserRouter as Router, Route, Switch } from "react-router-dom";
After importing react-router-dom, lets route our application. Here goes the code ⬇️
<Router>
    <Switch>
        <Route path="/" exact>
            <Home />
        </Route>
        <Route path="/signin" exact>
            <SignIn />
        </Route>
        <Route path="/signup" exact>
            <SignUp />
        </Route>
        <Route path="/reset" exact>
            <Reset />
        </Route>
    </Switch>
</Router>
Now, our app will be ready on these endpoints ✌️
| Page | Endpoint |
|---|---|
| Home | http://localhost:3000/ |
| Sign In | http://localhost:3000/signin |
| Sign Up | http://localhost:3000/signup |
| Reset | http://localhost:3000/reset |
Now, let's create our SignUp.js page. It simply have a form and a signUpSubmit variable passing from App.js. ⬇️
import React from "react";
import { Link } from "react-router-dom";

const SignUp = ({ signUpSubmit }) => {
  return (
    <div class="wrapper">
      <h1 class="main-heading">Sign up</h1>
      <p class="sub-text">Sign up using your email and password.</p>
      <div class="form-wrapper">
        <form id="registerForm" onSubmit={signUpSubmit}>
          <div class="input-field">
            <label>Email</label>
            <input type="email" placeholder="Email" name="email" />
          </div>
          <div class="input-field">
            <label>Password</label>
            <input type="password" placeholder="Password" name="password" />
          </div>
          <button class="main-button" type="submit">
            Register
          </button>
        </form>
      </div>
      <div class="bottom-message">
        <h5>
          Already a user? <Link to="/signin">Sign in</Link>
        </h5>
      </div>
    </div>
  );
};

export default SignUp;
Now, let's create our signUpSubmit function to handle SignUp, we're obtaining email and password from the submit, we just have to call a firebase createUserWithEmailAndPassword() function to make it work. 👇
const signUpSubmit = (e) => {
    e.preventDefault();

    const email = e.target.email.value;
    const password = e.target.password.value;

    auth
        .createUserWithEmailAndPassword(email, password)
        .then(() => {
            console.log("User Created");
            window.open("/signin", "_self");
        })
        .catch((error) => {
            alert(error.message);
        });
};
After creating signUpSubmit, lest just pass it to SignUp.js.
<Route path="/signup" exact>
    <SignUp signUpSubmit={signUpSubmit} />
</Route>
Now, if we go to http://localhost:3000/signup, we can see this ✌️
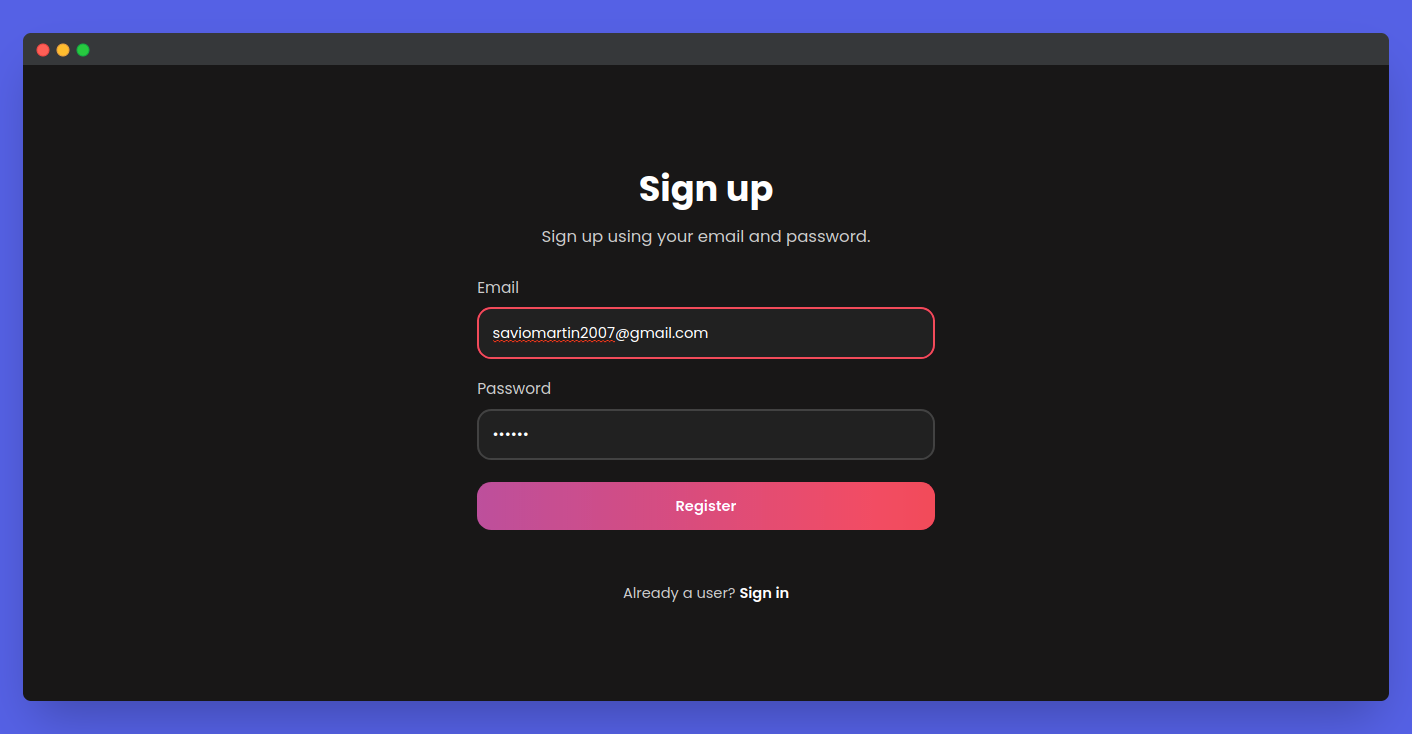
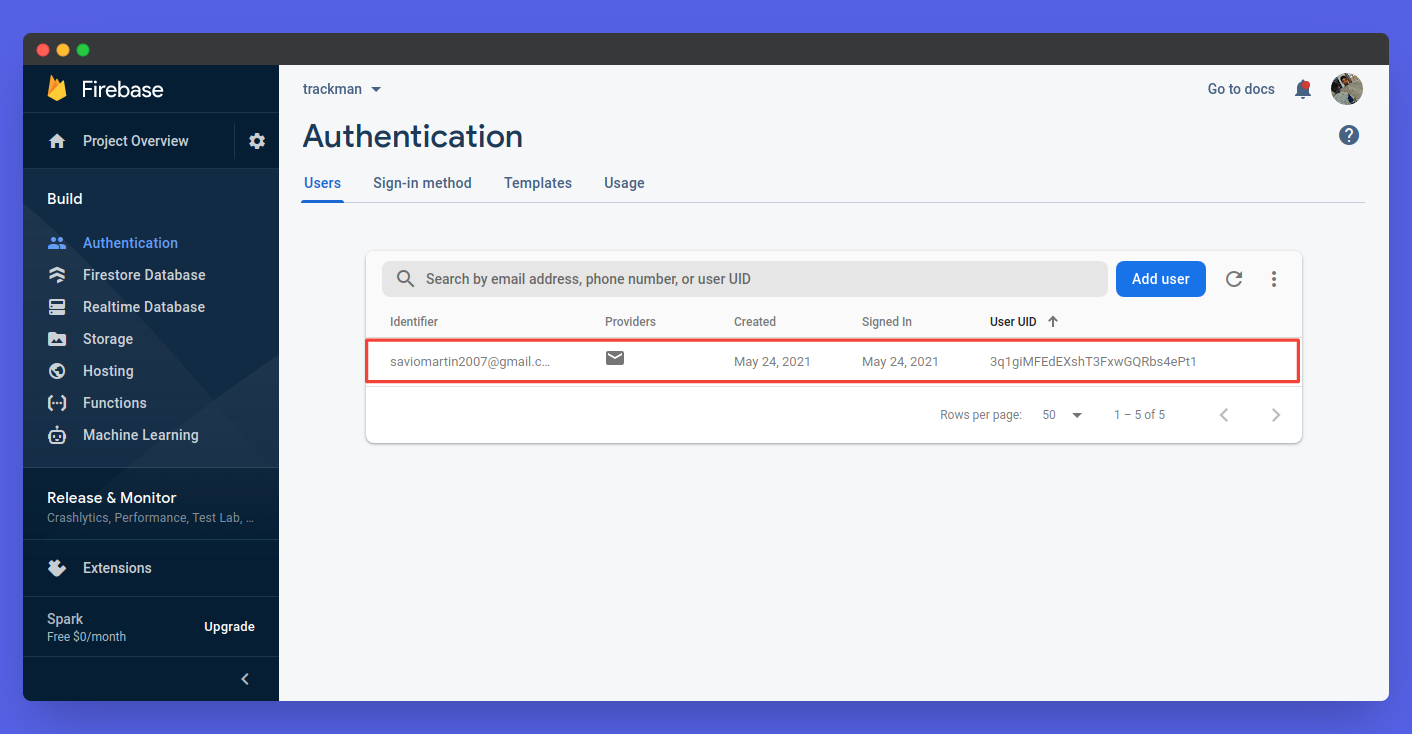
After submitting the form, lets head over to Firebase Console, we can see a new user added ✨️
That's pretty much it! We're on our way! Handling sign-up is completed! Good job 🥳
Handling SignIn
Now, here comes our next challenge, lets now handle signIn. First of all, lets create our SignIn.js component. Here goes our component code ⬇️
import React from "react";
import { Link } from "react-router-dom";

const SignIn = ({ signInSubmit }) => {
  return (
    <div class="wrapper">
      <h1 class="main-heading">Sign in</h1>
      <p class="sub-text">Sign in using your email and password.</p>
      <div class="form-wrapper">
        <form id="loginForm" onSubmit={signInSubmit}>
          <div class="input-field">
            <label>Email</label>
            <input type="email" placeholder="Email" name="email" />
          </div>
          <div class="input-field">
            <label>Password</label>
            <input type="password" placeholder="Password" name="password" />
          </div>
          <button class="main-button" type="submit">
            Sign in
          </button>
        </form>
      </div>
      <div class="bottom-message">
        <h5>
          New here? <Link to="/signup">Sign up</Link>
        </h5>
        <h5>
          Forgot Password? <Link to="/reset">Reset here</Link>
        </h5>
      </div>
    </div>
  );
};

export default SignIn;
Now, let's create our signInSubmit function to handle Sign In. Its pretty easy, we're just signInWithEmailAndPassword() function of firebase with parameters email and password, Check this out 👇
const signInSubmit = (e) => {
    e.preventDefault();

    const email = e.target.email.value;
    const password = e.target.password.value;

    auth
        .signInWithEmailAndPassword(email, password)
        .then(() => {
            console.log("User Signed In");
            window.open("/", "_self");
        })
        .catch((error) => {
            alert(error.message);
        });
};
After creating signInSubmit, lest just pass it to SignIn.js. ⬇️
<Route path="/signin" exact>
    <SignIn signInSubmit={signInSubmit} />
</Route>
Now, if we go to http://localhost:3000/signin, we can see this ✌️
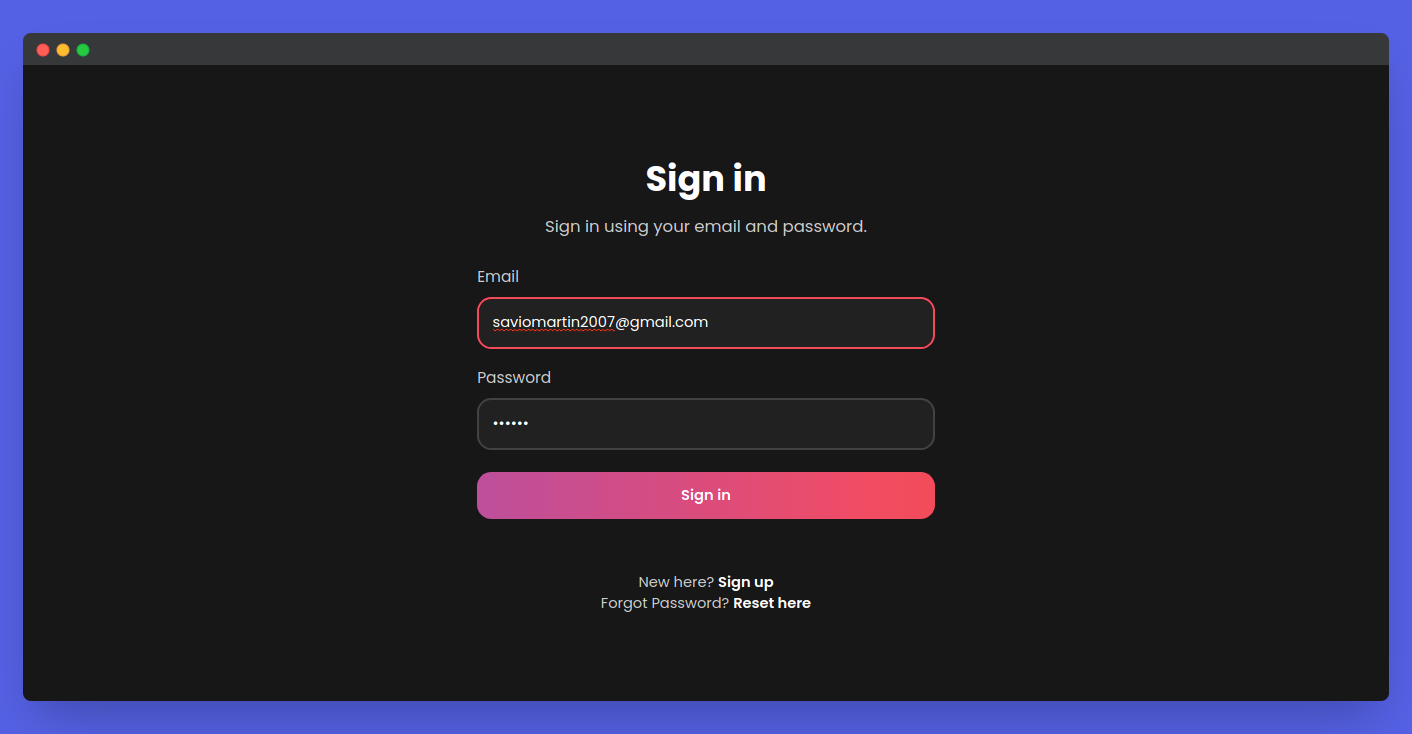
After submitting the form correctly, We can see a User Signed In message on console and we, get redirected to http://localhost:3000/ ✨️
That's pretty much it! We're on our way! Handling sign-in is completed! Good job again 🥳
Handling Reset Password
Handling reset password is the most easiest part of the app, First, lets create our Reset.js component ⬇️
import React from "react";
import { Link } from "react-router-dom";

const Reset = ({ resetSubmit }) => {
  return (
    <div class="wrapper">
      <h1 class="main-heading">Reset Password</h1>
      <p class="sub-text">Enter your email address to reset your password.</p>
      <div class="form-wrapper">
        <form id="resetForm" onSubmit={resetSubmit}>
          <div class="input-field">
            <label>Email</label>
            <input type="email" placeholder="Email" name="email" />
          </div>
          <button class="main-button" type="submit">
            Reset
          </button>
        </form>
      </div>
      <div class="bottom-message">
        <h5>
          New here? <Link to="/signup">Sign up</Link>
        </h5>
      </div>
    </div>
  );
};

export default Reset;
Now, in our App.js, lets create a function to handle reset, naming it resetSubmit, It takes email from the event and call sendPasswordResetEmail() method of firebase. Check out the code 👇
const resetSubmit = (e) => {
    e.preventDefault();

    const email = e.target.email.value;

    auth
        .sendPasswordResetEmail(email)
        .then(function() {
            alert("Reset Email Sent 🚀");
        })
        .catch(function(error) {
            alert(error.message);
        });
};
Now, if we go to http://localhost:3000/reset, we can see this ✌️
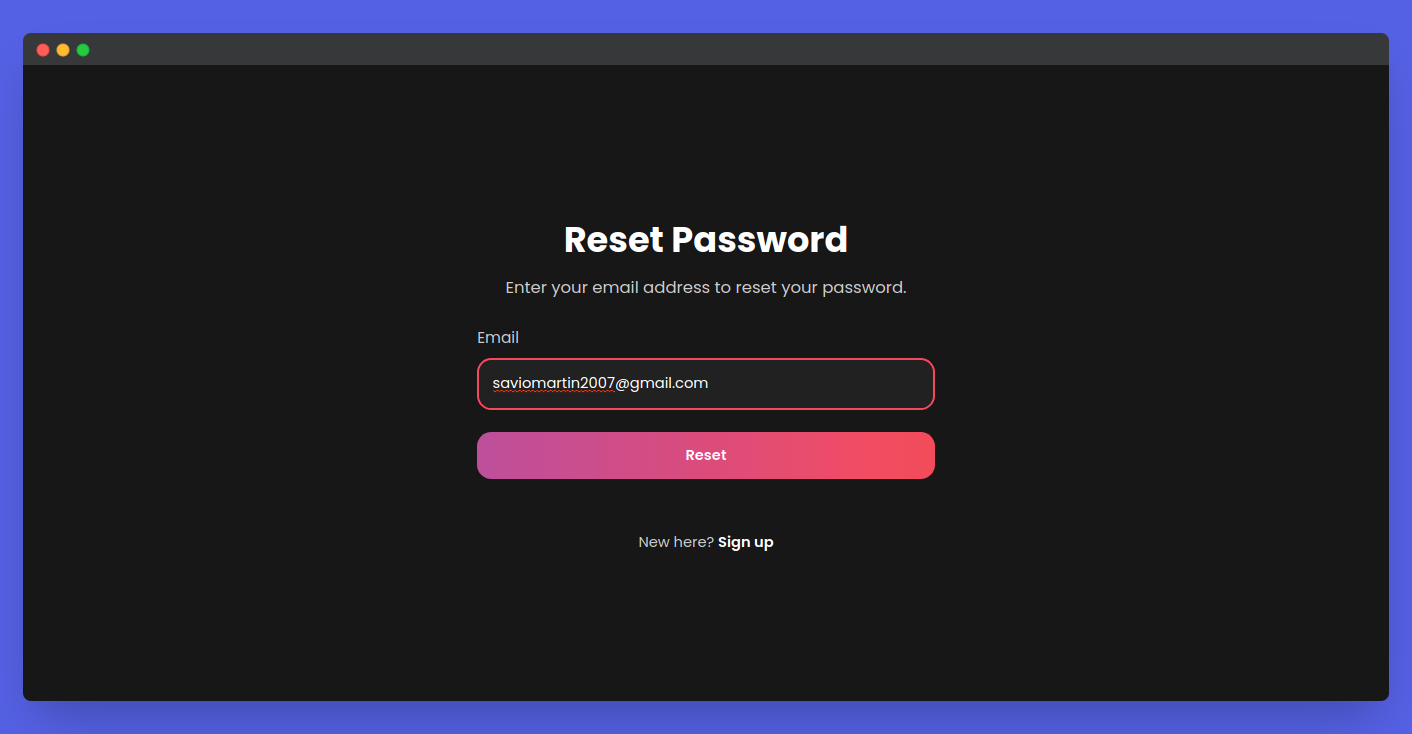
Now, if we enter our email adress and submits the form, we can see a new mail came to us 👇
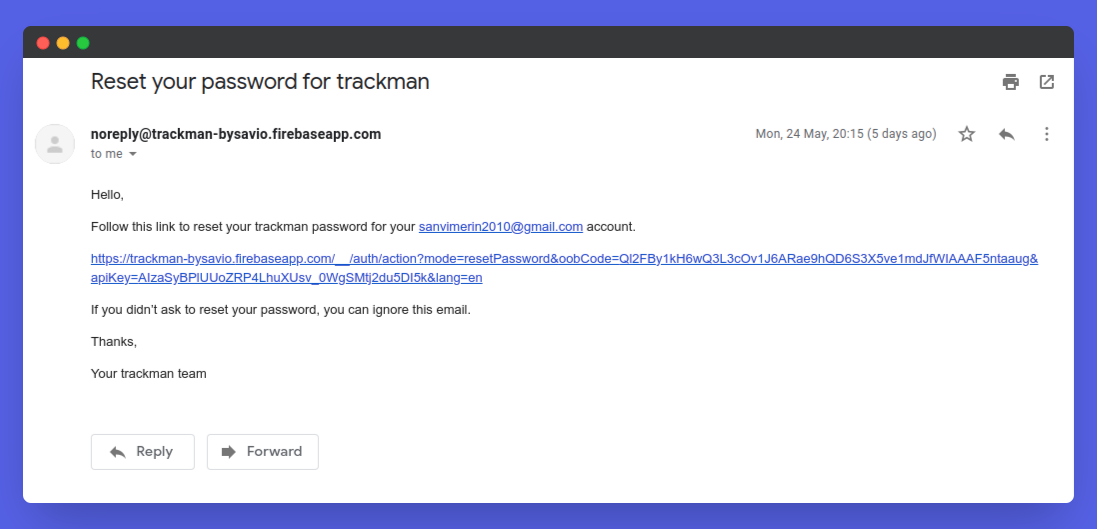
And if we go through that link, we can edit your password! Congrats 🔥 You're going great so far!
Handling SignOut
Now, here comes our last part, lets first handle our Home.js. It is simple component that just greet users ✌️. Here is the code ⬇️
import React from "react";

const Home = ({ signOut, user }) => {
  return (
    <div class="wrapper">
      <h1 class="main-heading">Hello 👋, {user.email}</h1>
      <button class="main-button" id="signOut" onClick={signOut}>
        Sign Out
      </button>
    </div>
  );
};

export default Home;
Now, we can handle our user for that, lets create a useState variable 👇
const [user, setUser] = useState([]);
Now, let's check, if a user is there or not, that we can use onAuthStateChanged() method of firebase. Here is the code 👀
auth.onAuthStateChanged((user) => {
    if (user) {
        setUser(user);
    }
});
Now, after signing In and go to http://localhost:3000/, we can see this 👀
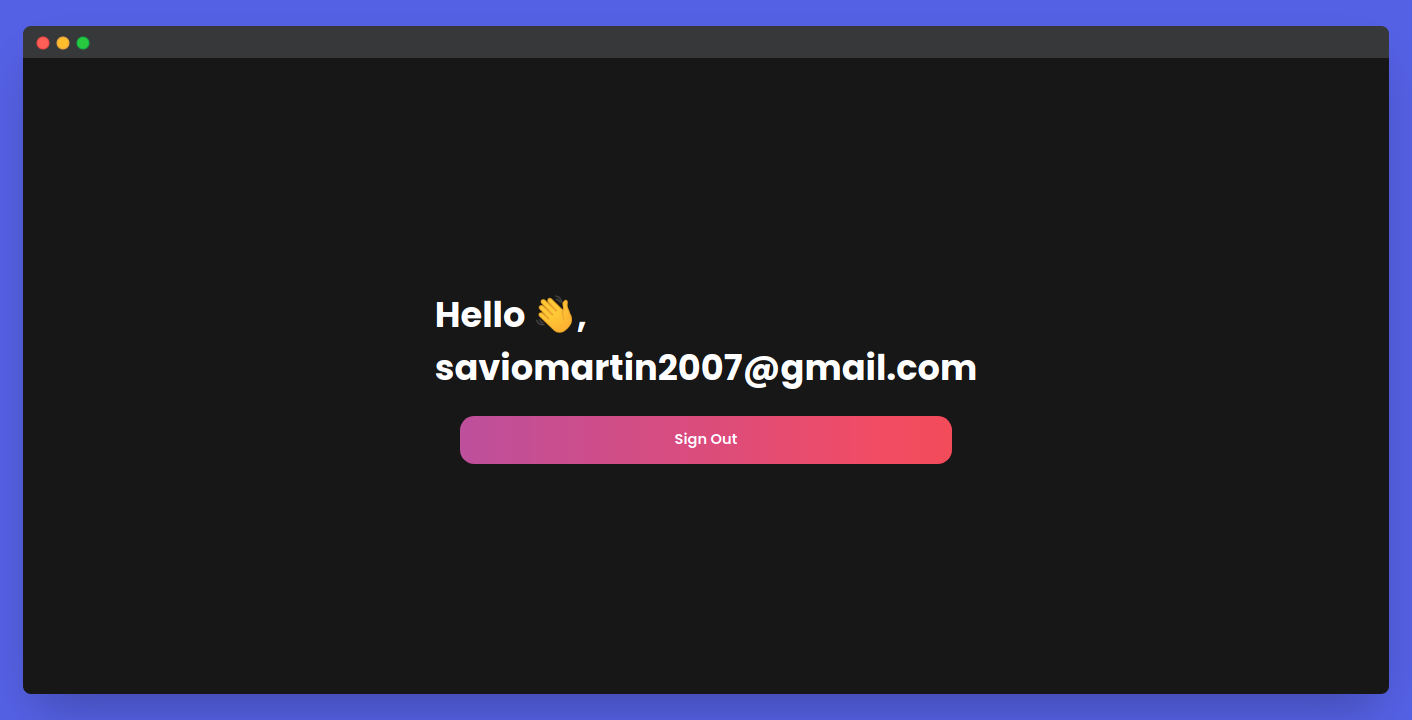
We can also see that user is persistant, that means, if we reload or do some kind on that stuff, user still gets reloaded.
Now, lets handle Sign Out, we can use signOut() of method of firebase for it. ⬇️
const signOut = () => {
    auth
        .signOut()
        .then(() => {
            console.log("User Signed Out");
            window.open("/signin", "_self");
        })
        .catch((error) => {
            console.log(error);
        });
};
After that, we can pass the user and signOut method to our Home.js 👇
<Route path="/" exact>
    <Home signOut={signOut} user={user} />
</Route>
Congrats 🍻 Our App working is completed, well done to you. Now, the only thing ahead is just to test it 🎉
Testing Up
-
Now, let's test up everything, first let's go to http://localhost:3000/signup, enter email address and password, click on Sign Up, which creates a new user on our firebase project. ✅️
-
Now, let's go to http://localhost:3000/signin, and sign In with the email and password, we'll now be redirected to the home page. ✅️
-
Lets go to http://localhost:3000/reset and enter our email, we can now get a new mail with a reset link ✅️
-
If we go to http://localhost:3000/, we can see our email, with a greeting message ✅️
Congrats 🥳, you rock! You just learnt to use email authentication, now, feel free to use this knowledge 👀
Here is the complete code for the project - github.com/saviomartin/firebase-auth-methods, Make sure to 🌟 the repo.
👀 Wrapping Up
Yeah, that's a wrap. Hope you enjoyed the article. Do not hesitate to share your feedback. I am on Twitter @saviomartin7. Give a follow!
Follow me on Github @saviomartin, Don't miss my amazing projects! 💯
Feedbacks are greatly appreciated! 🙌 Have an amazing day!
🌎 Lets connect
🙌 Support
If you're enjoying my blog, consider buying me a coffee ☕️, it will help me a lot!